Beauty Tips by Tania

Monthly Archives: December 2012

You are browsing the site archives by month.

So Formal, So Easy!

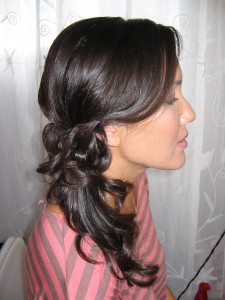
As promised this is my second easy, formal look that any girl can whip up with a a rubberband and a few bobby pins.  First, make a part hair on one side of your head and grab all your hair to the opposite side and make a low ponytail behind ear.  For a youthful, trendy look, curl the ends with a 1″ curling iron and wrap a small strand of hair around the ponytail and use a bobby pins to secure the end.

From here, if you’re hoping to achieve a more elegant and sophisticated look, grab a small strand and curl it around your finger and place it close the base of the ponytail to make a small barrel-size curl and bobby pin the curl close to the ponytail. You may continue to use this same technique, placing the curls around the ponytail so that the base of the ponytail is hidden by the curls. Now hairspray it in place and add your favorite hair jewel/pin or flower near the top and front of the curls. Voila!



Quick & Easy Hairstyling for Your Special Event

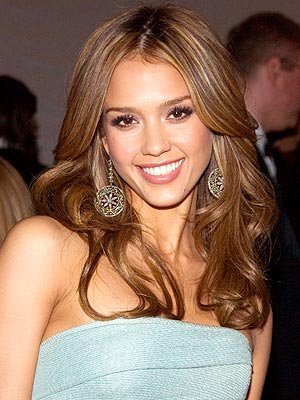
Hey Girls,  We all know that time is of the essence so for my next 3 posts, I’ll describe my 3 favorite hairstyling tips suitable for any event.  Today’s first hairstyle is an all-down curly style using curlers and curling iron.  Put 4 to 5 rollers in your hair, curled backward, in a line at the top of your head, placing rollers front to back.  At this point, it will look like a mohawk on the top of your head.  Then grab small sections of the rest of the your hair and with the curling iron, curl the bottom ends, rolling up about half way.  Remove curlers from the top of your head, throw your head forward, shake your head and flip your hair back.  Run your fingers through the ends to define waves and spray as desired.  To show off your sparkling earrings, pull a small strand of hair up above your ear, twist the strand of hair and bobby pinning it back revealing your earring.

Stay tuned for my next favorite hairstyling tip. . . .


Prime the Skin to Perfection

Longevity is key to any day to night time makeup, especially if you have oily skin. The best way to prep the skin is with a base, try MAC ‘s prep and prime skin base to use under your foundation and after your oil control lotion.  If you have dry skin, use a light to heavy cream depending on your level of dryness.  You can always use heavier cream on the dryer areas and let it soak into the skin for a minute.  Then apply your primer, either with your clean hands or a sponge.  Should you use your hands, press evenly and gently onto the skin.  Now your ready for the foundation. It’s 5 pm and your ready for a new look add a deeper cheek color on the contour of the cheeks and refresh your eye makeup with a darker liner and shadow in the outer corner.  Lastly, dust a mineralized powder in the T zone or use a blotting tissue to pick up shine. Look for a glittery gloss, to apply to the center of your lipcolor. Now have fun…

My favorite lip conditioner for the season

When the fickle weather has got you reaching for every product on the shelf…one thing I know for sure.  The MAC lip conditioner works fast to soften, smooth out dry chapped lips.  Also, I suggest using a tinted color choice in pink or mocha for daytime to repair your lips and restore your confident smile while offering you a soft lip color to compliment your beauty look.   Other suggestions to repair lips from the harsh weather, try using a warm cloth placed over the lips, then use a toothbrush to gently brush off any peeling skin.  Other organic ways to heal the lips,  try 100% shea butter but why stop at the lips, it’s good to use all over the body.

see more at www.maccosmetics.com